1
Choose your mat style
Choose your mat style. The currently supported mats have 1in or 1cm grid spacing.
2
Place mat under spining icon
You want to make sure the spinning icon is near the center of the mat. This maximizes your projection area. If you find the area is too small, you can move the projector further away from the cutting mat to help increase the projection size.
3
Dim Lights
Dim your lights so that the projector image is clear. While this is not as important as it is for AI Calibration, you will want to make sure you see the lines clearly.
4
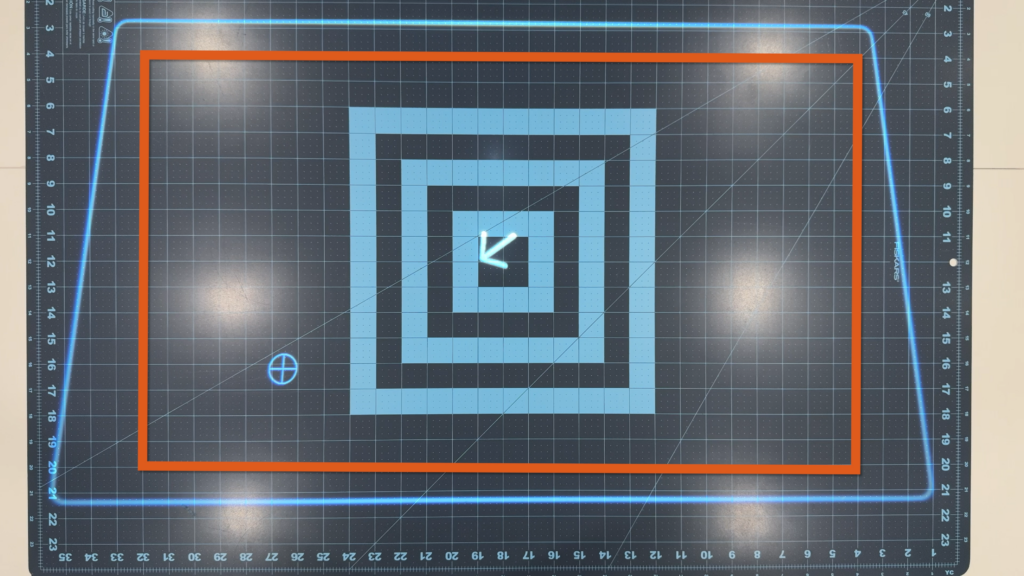
Identify largest rectangle
Now that your environment is setup, we will continue with the calibration. The first step is to find the largest rectangle on the cutting mat that is within the white outline. (Outlined in red).
Note: The larger the rectangle, the better the calibration. Always try to choose the largest rectangle you can see.
5
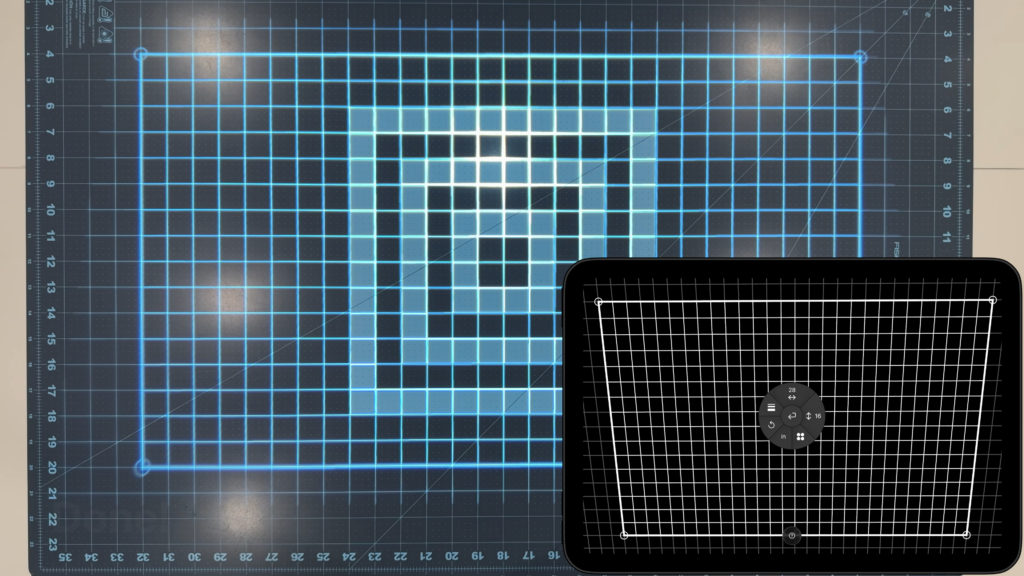
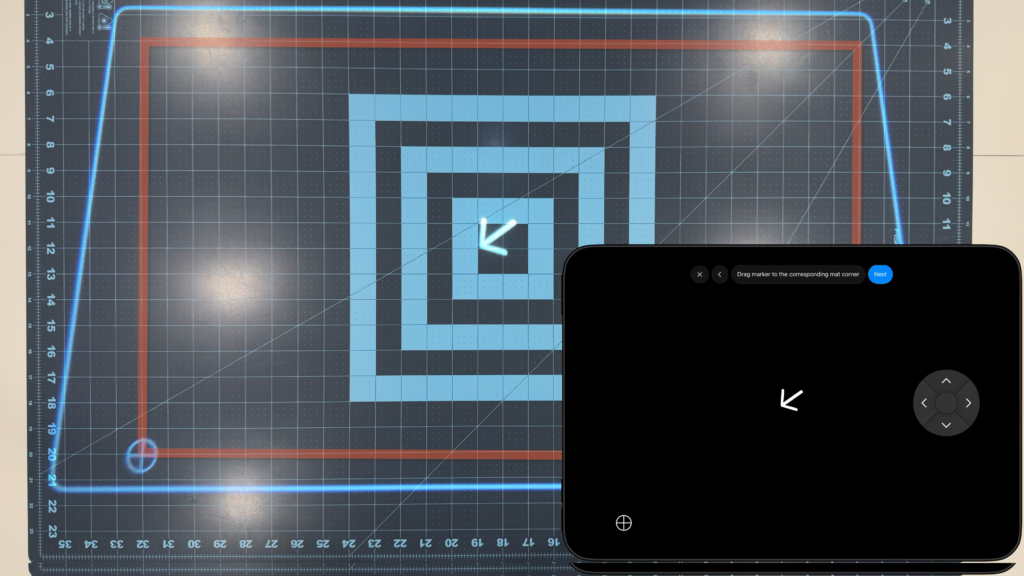
Drag marker to corner
Your goal is now to drag the the marker to each corner. We’ll start by moving the first marker to the bottom left corner of the mat. You can drag the marker and make use of the move menu to precisely place the marker.
6
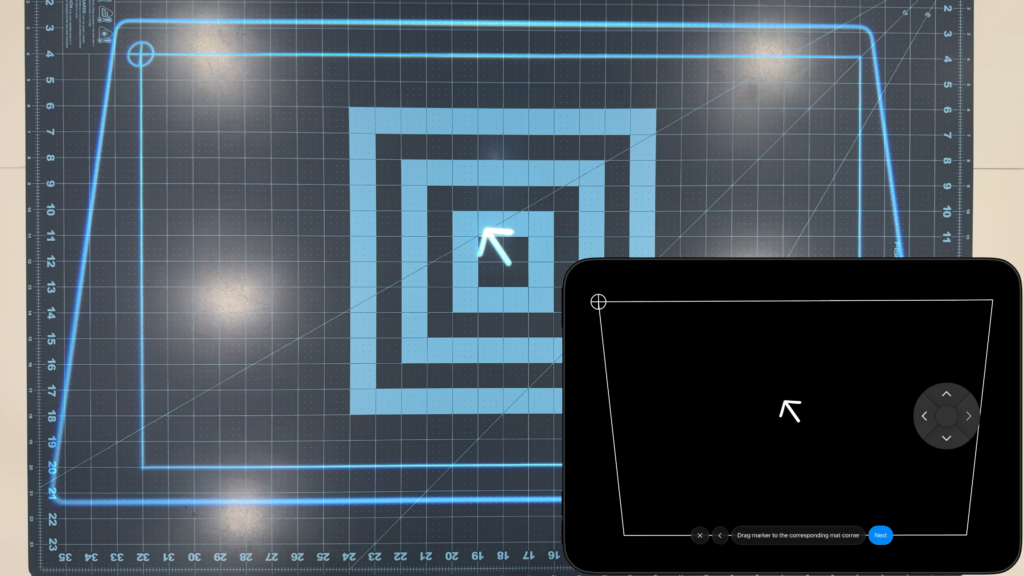
Repeat for all corners
Now we will do the same for all of the rest of the corners.
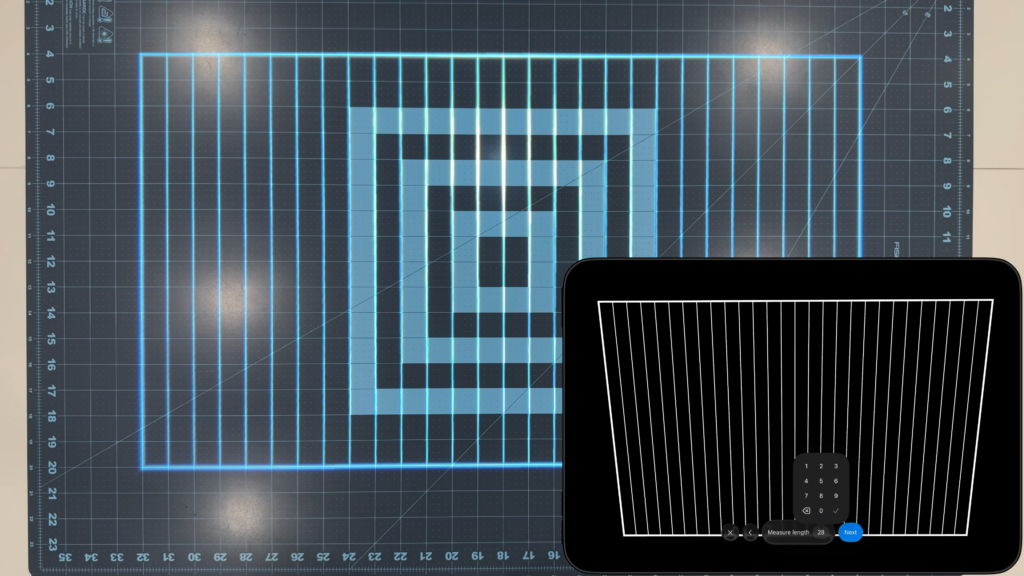
7
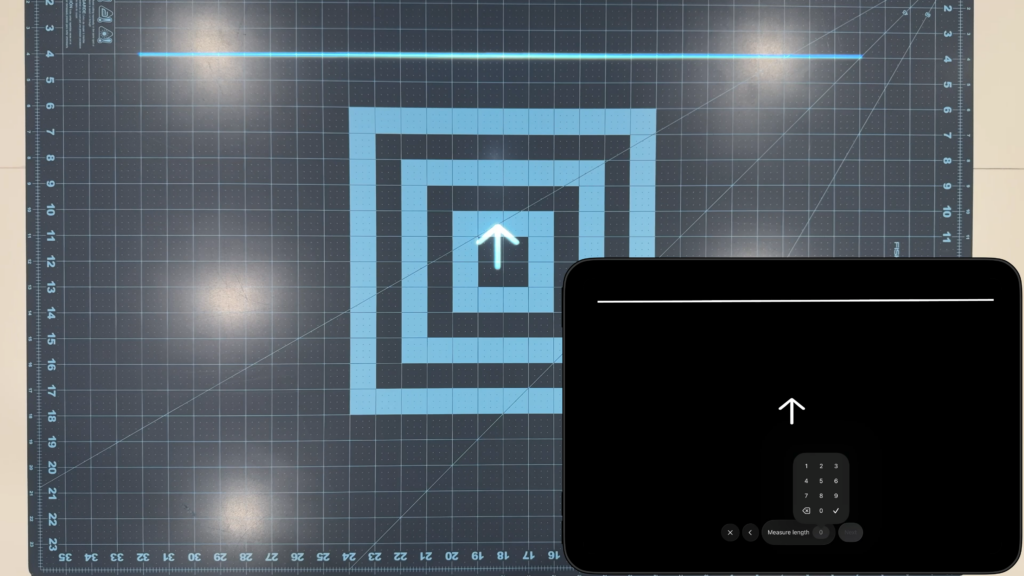
Enter rectangle width
Measure the highlighted line with a tape measure or using the markings. Enter the number in the app. If the width is correct, you’ll see vertical lines that line up with the grid.
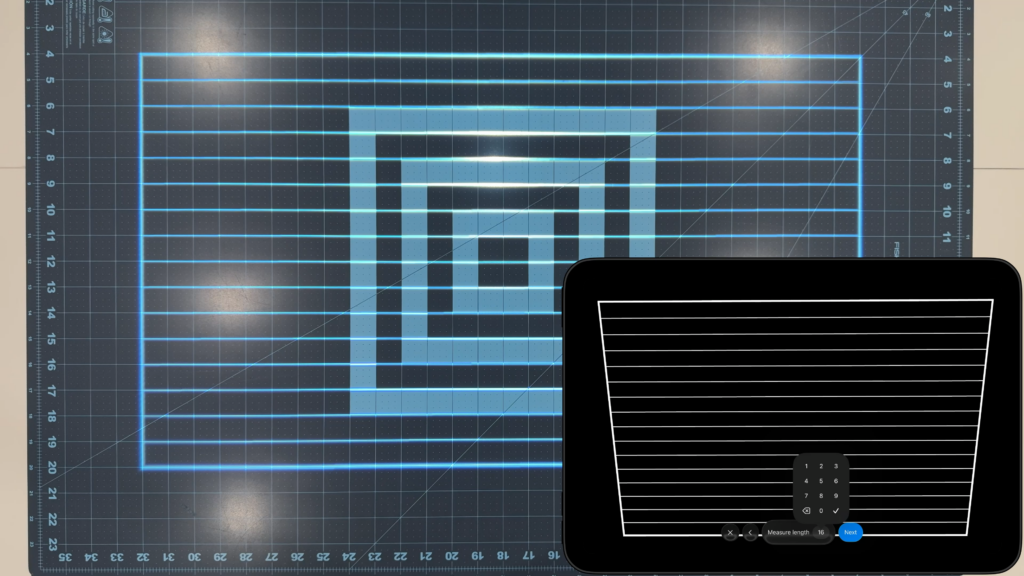
8
Enter rectangle height
Repeat the same as the previous step but for the height. Verify the horizontal lines match up.

9
Done
You’re done! If you want to make any small adjustments, you can do so by selecting the corresponding corner and moving it.