1
Start a new project
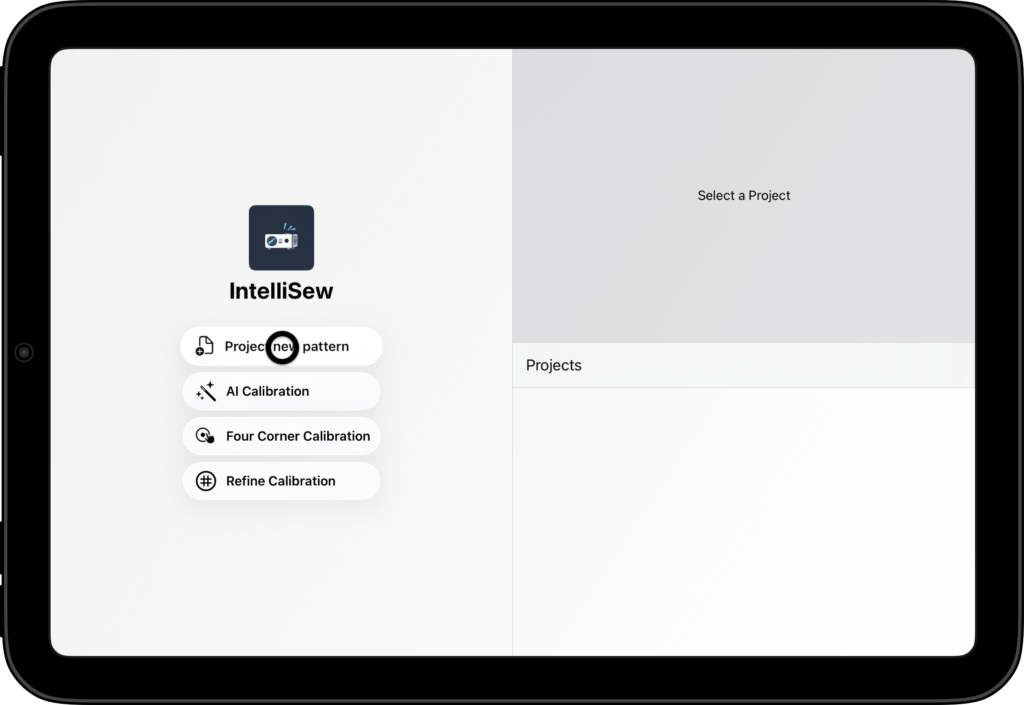
Press “Start a new project” and select your pattern
2
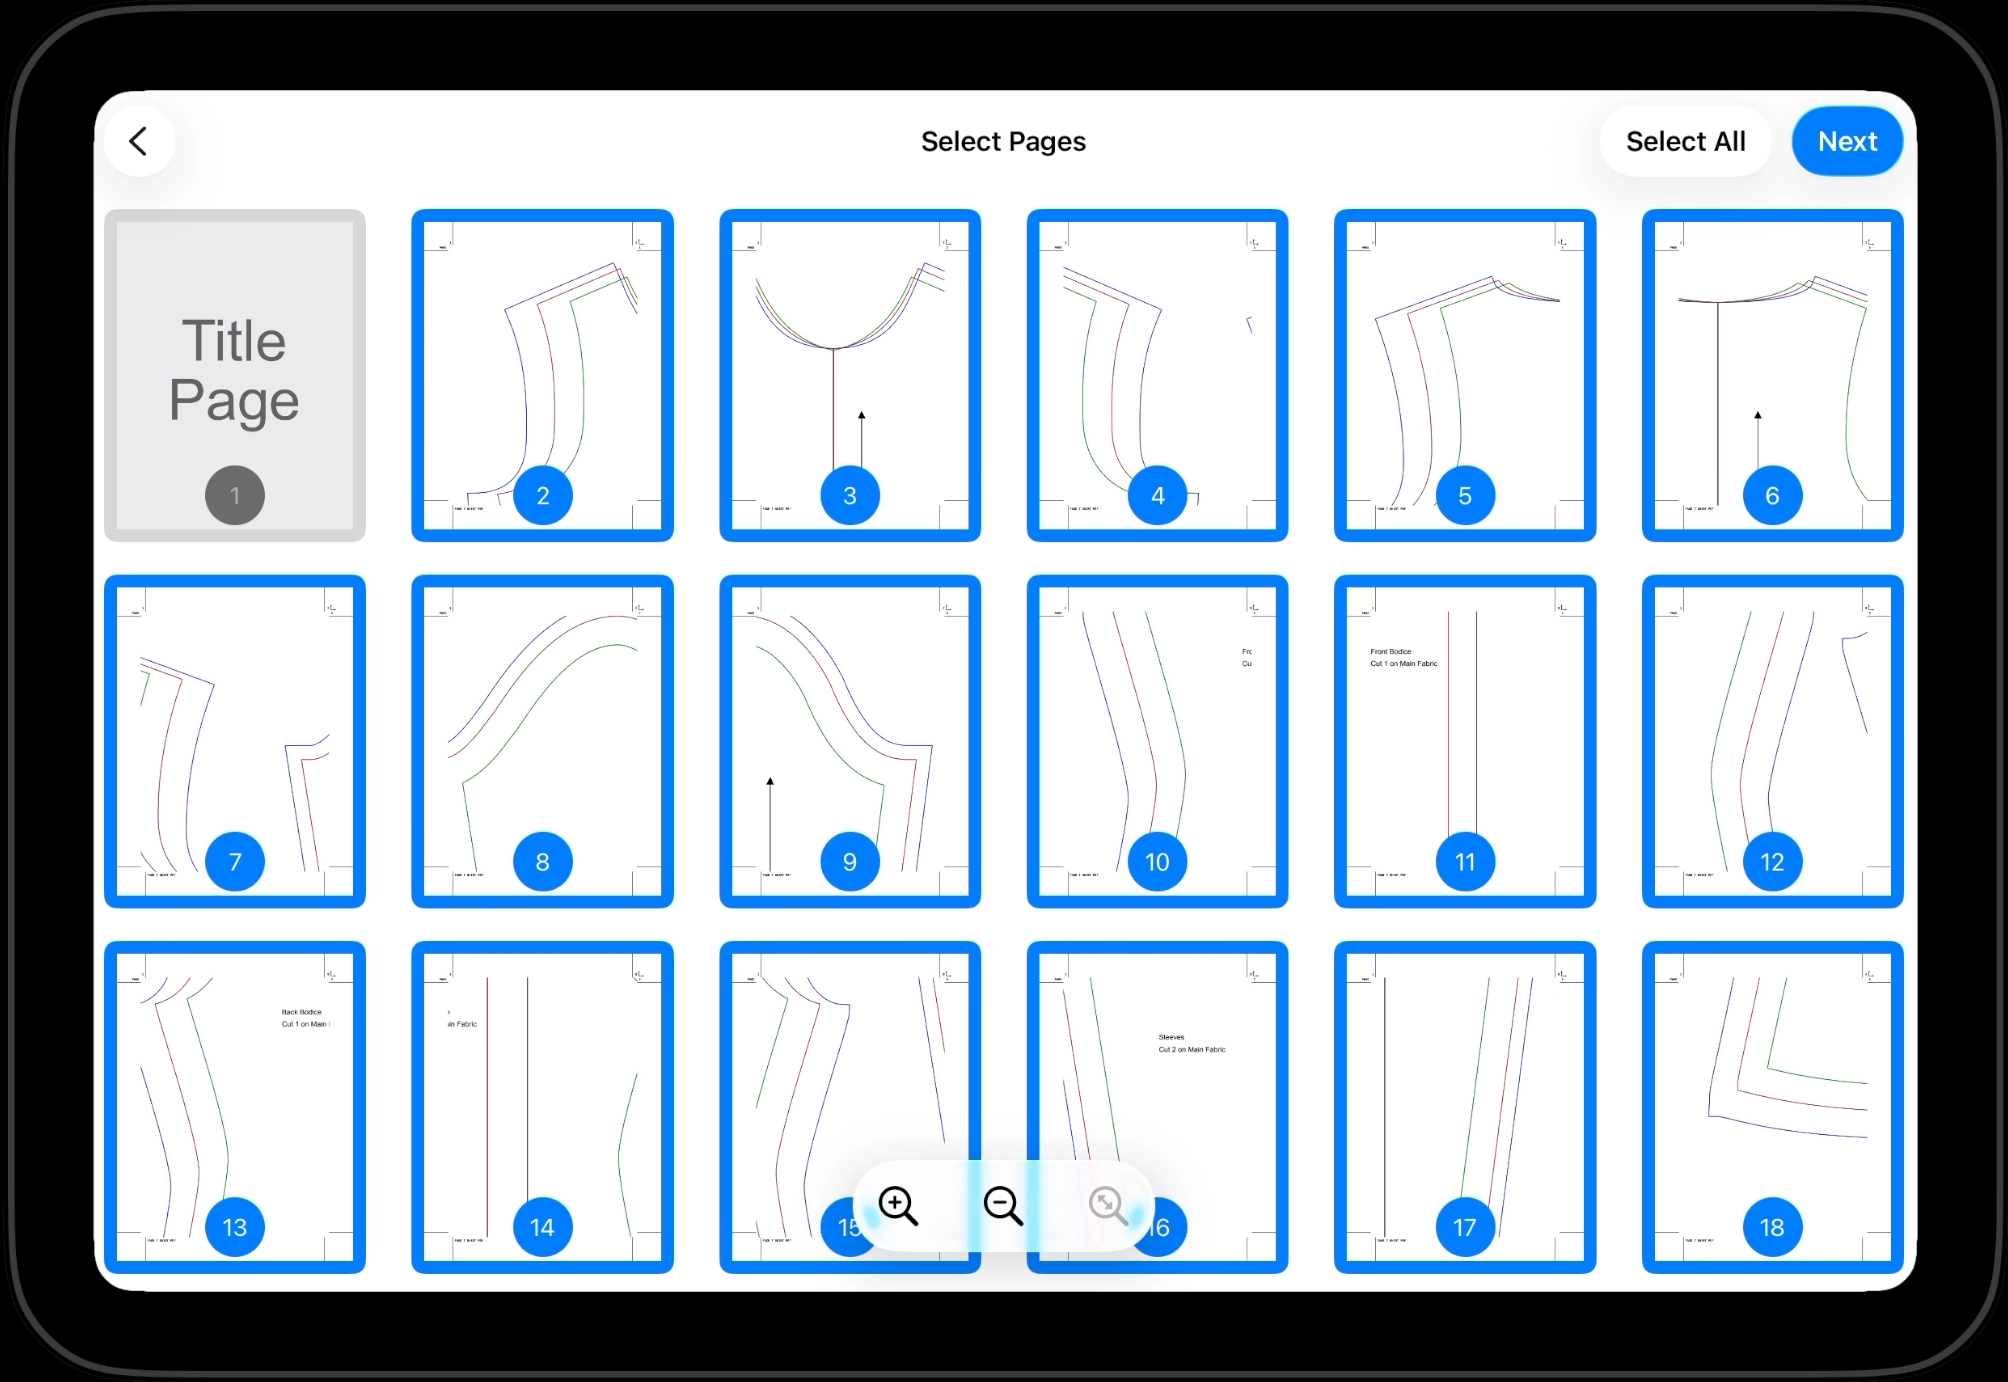
Select Pages
Once the pattern is loaded, your next step is to select/deselect the relevant pages from the pattern. You can tap on a page to toggle it. You can also zoom in and out of the pages using two fingers or the controls at the bottom.
In our case we de-select the title page
3
Select Rows vs Columns
The next steps is to select the pattern layout. If you have 16 pages, there are two possible ways to layout the pattern, by rows and by columns. The following images show the two layouts
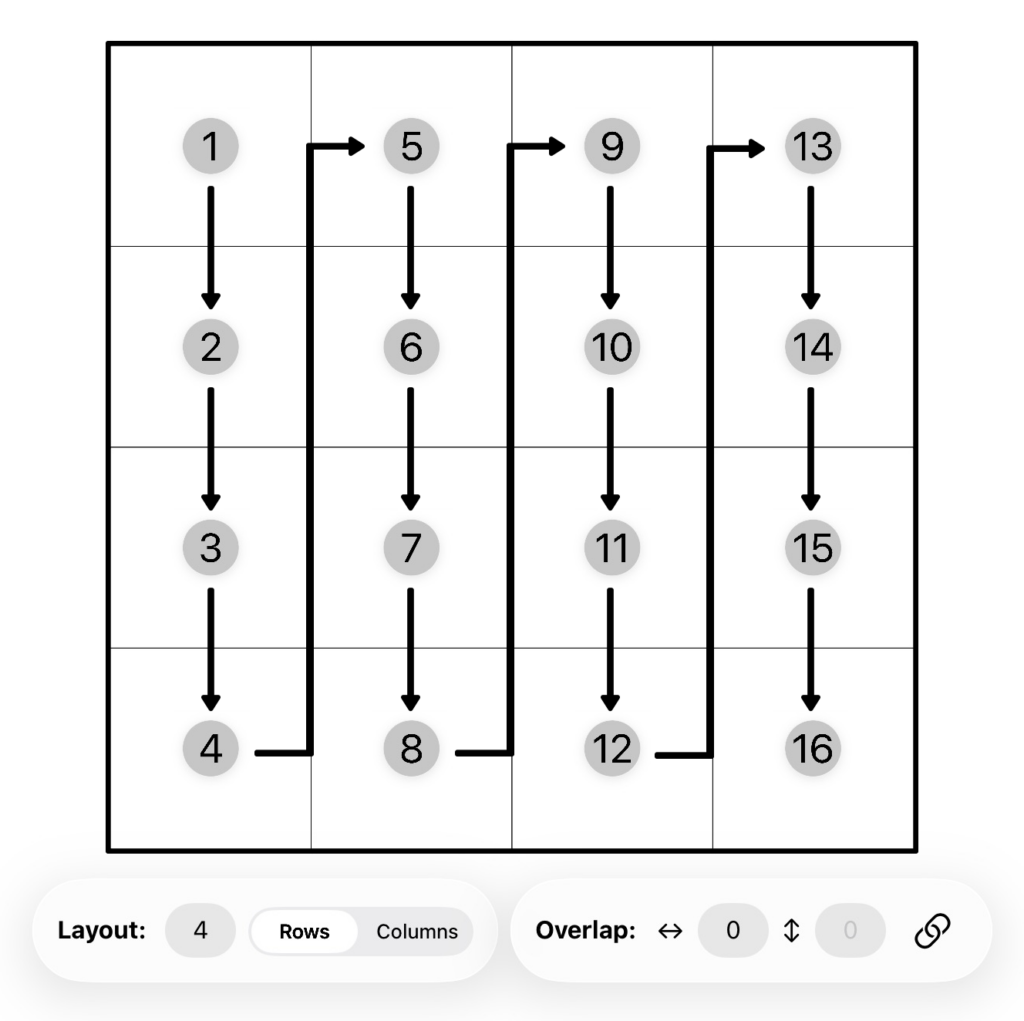
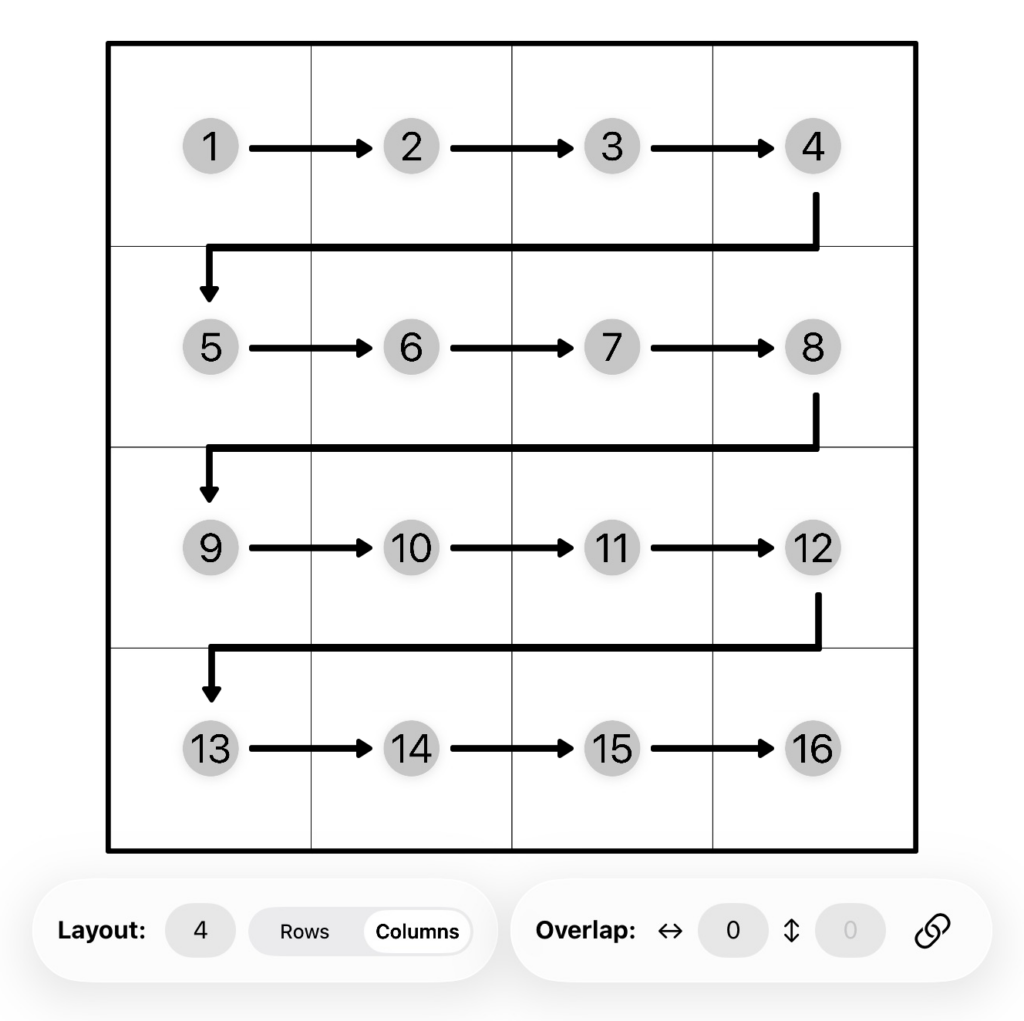
In our scenario, we we can see from the first 2 pages, the pattern will go in column order. This gives us the following:
4
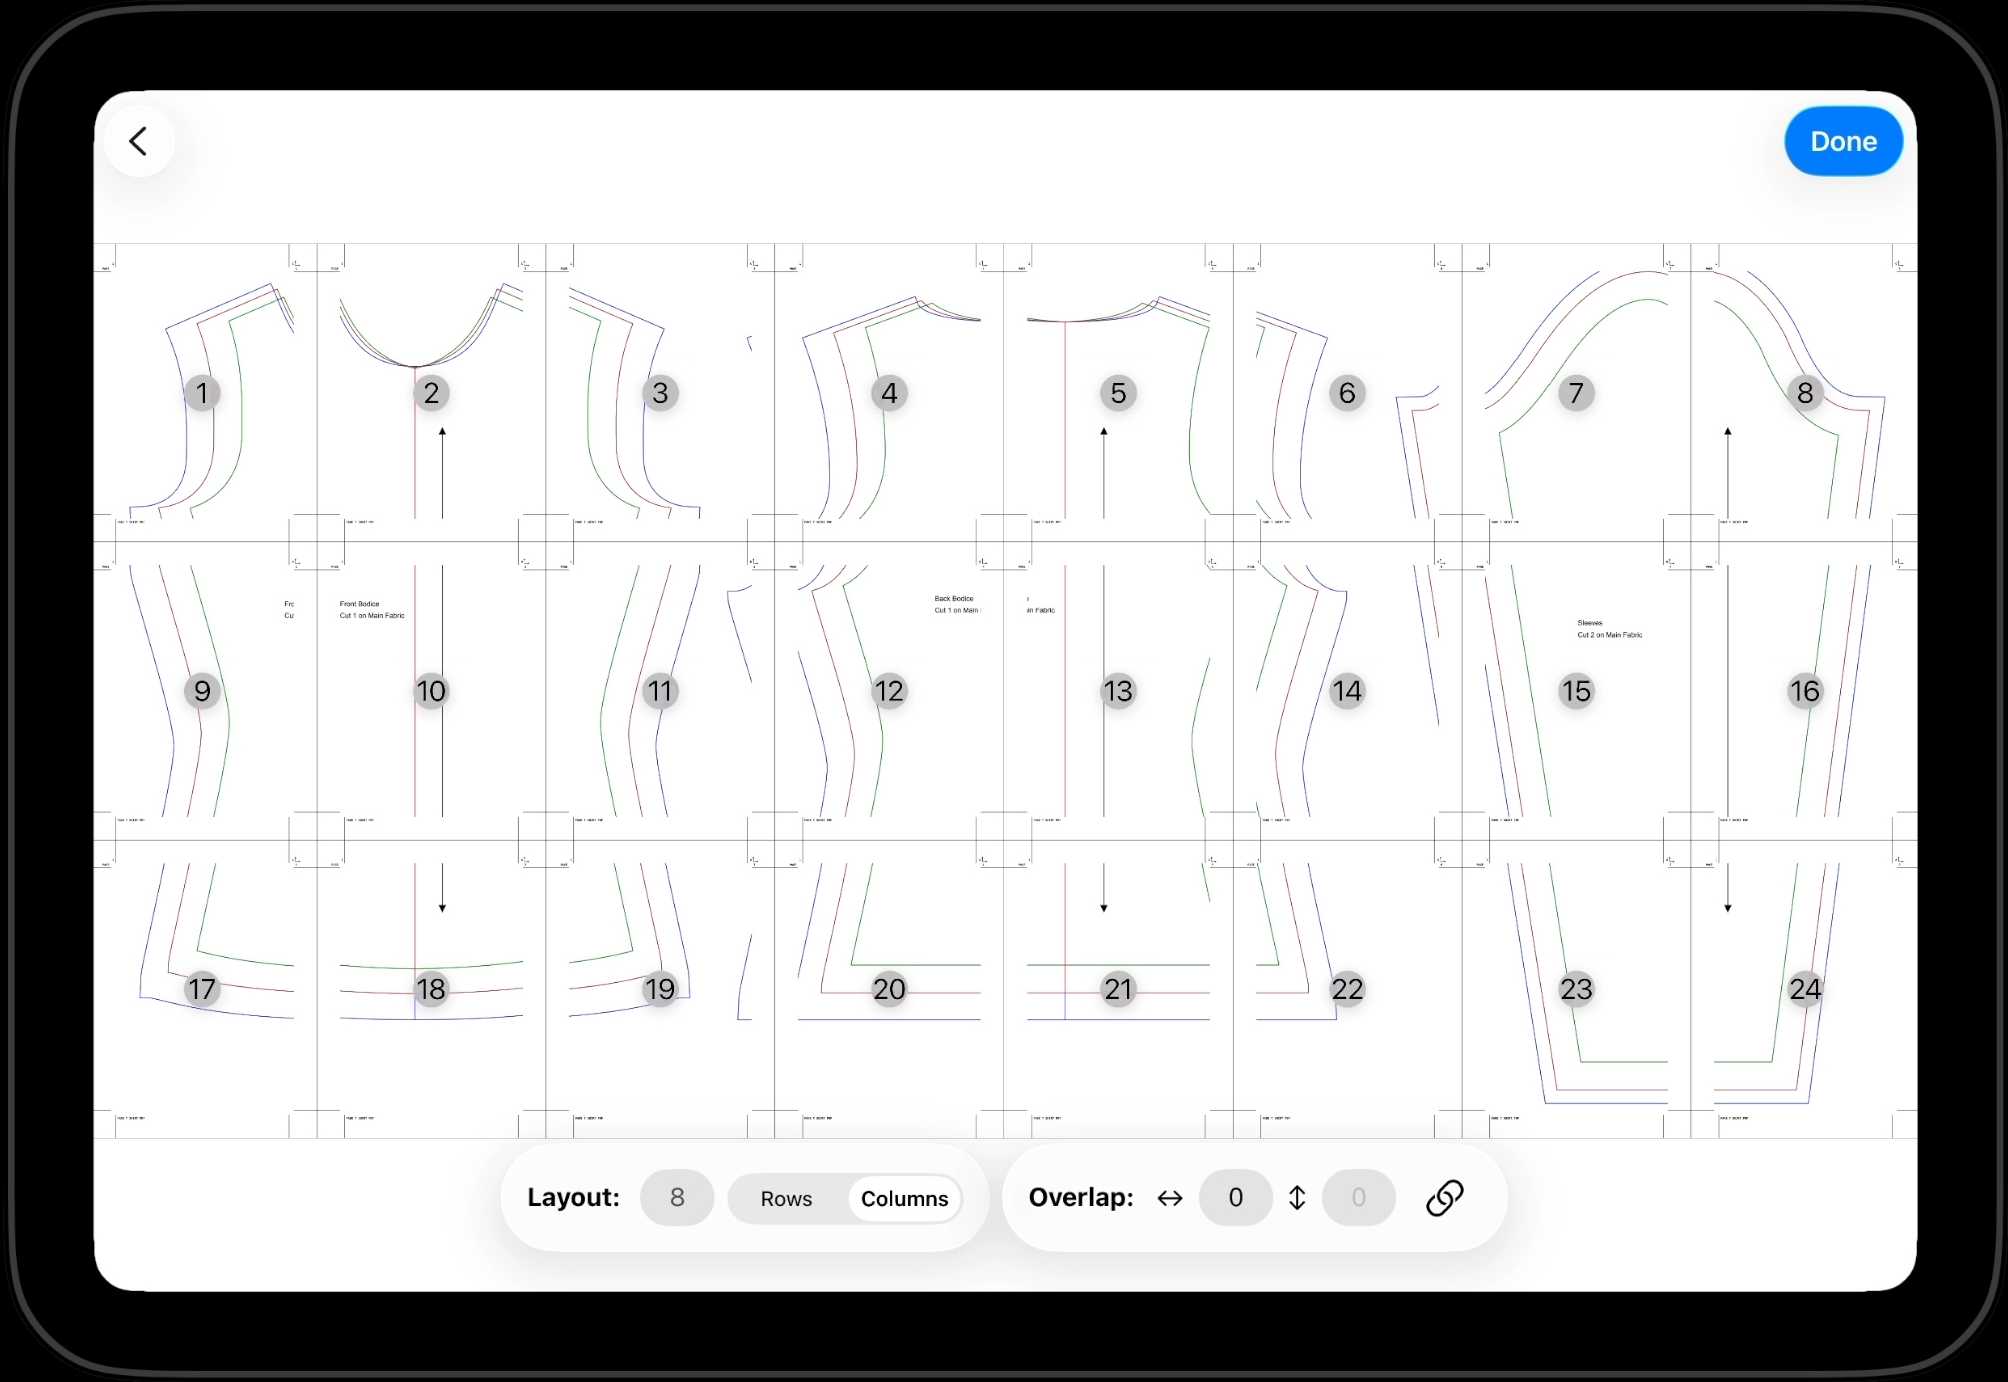
Select Number of Rows/Columns
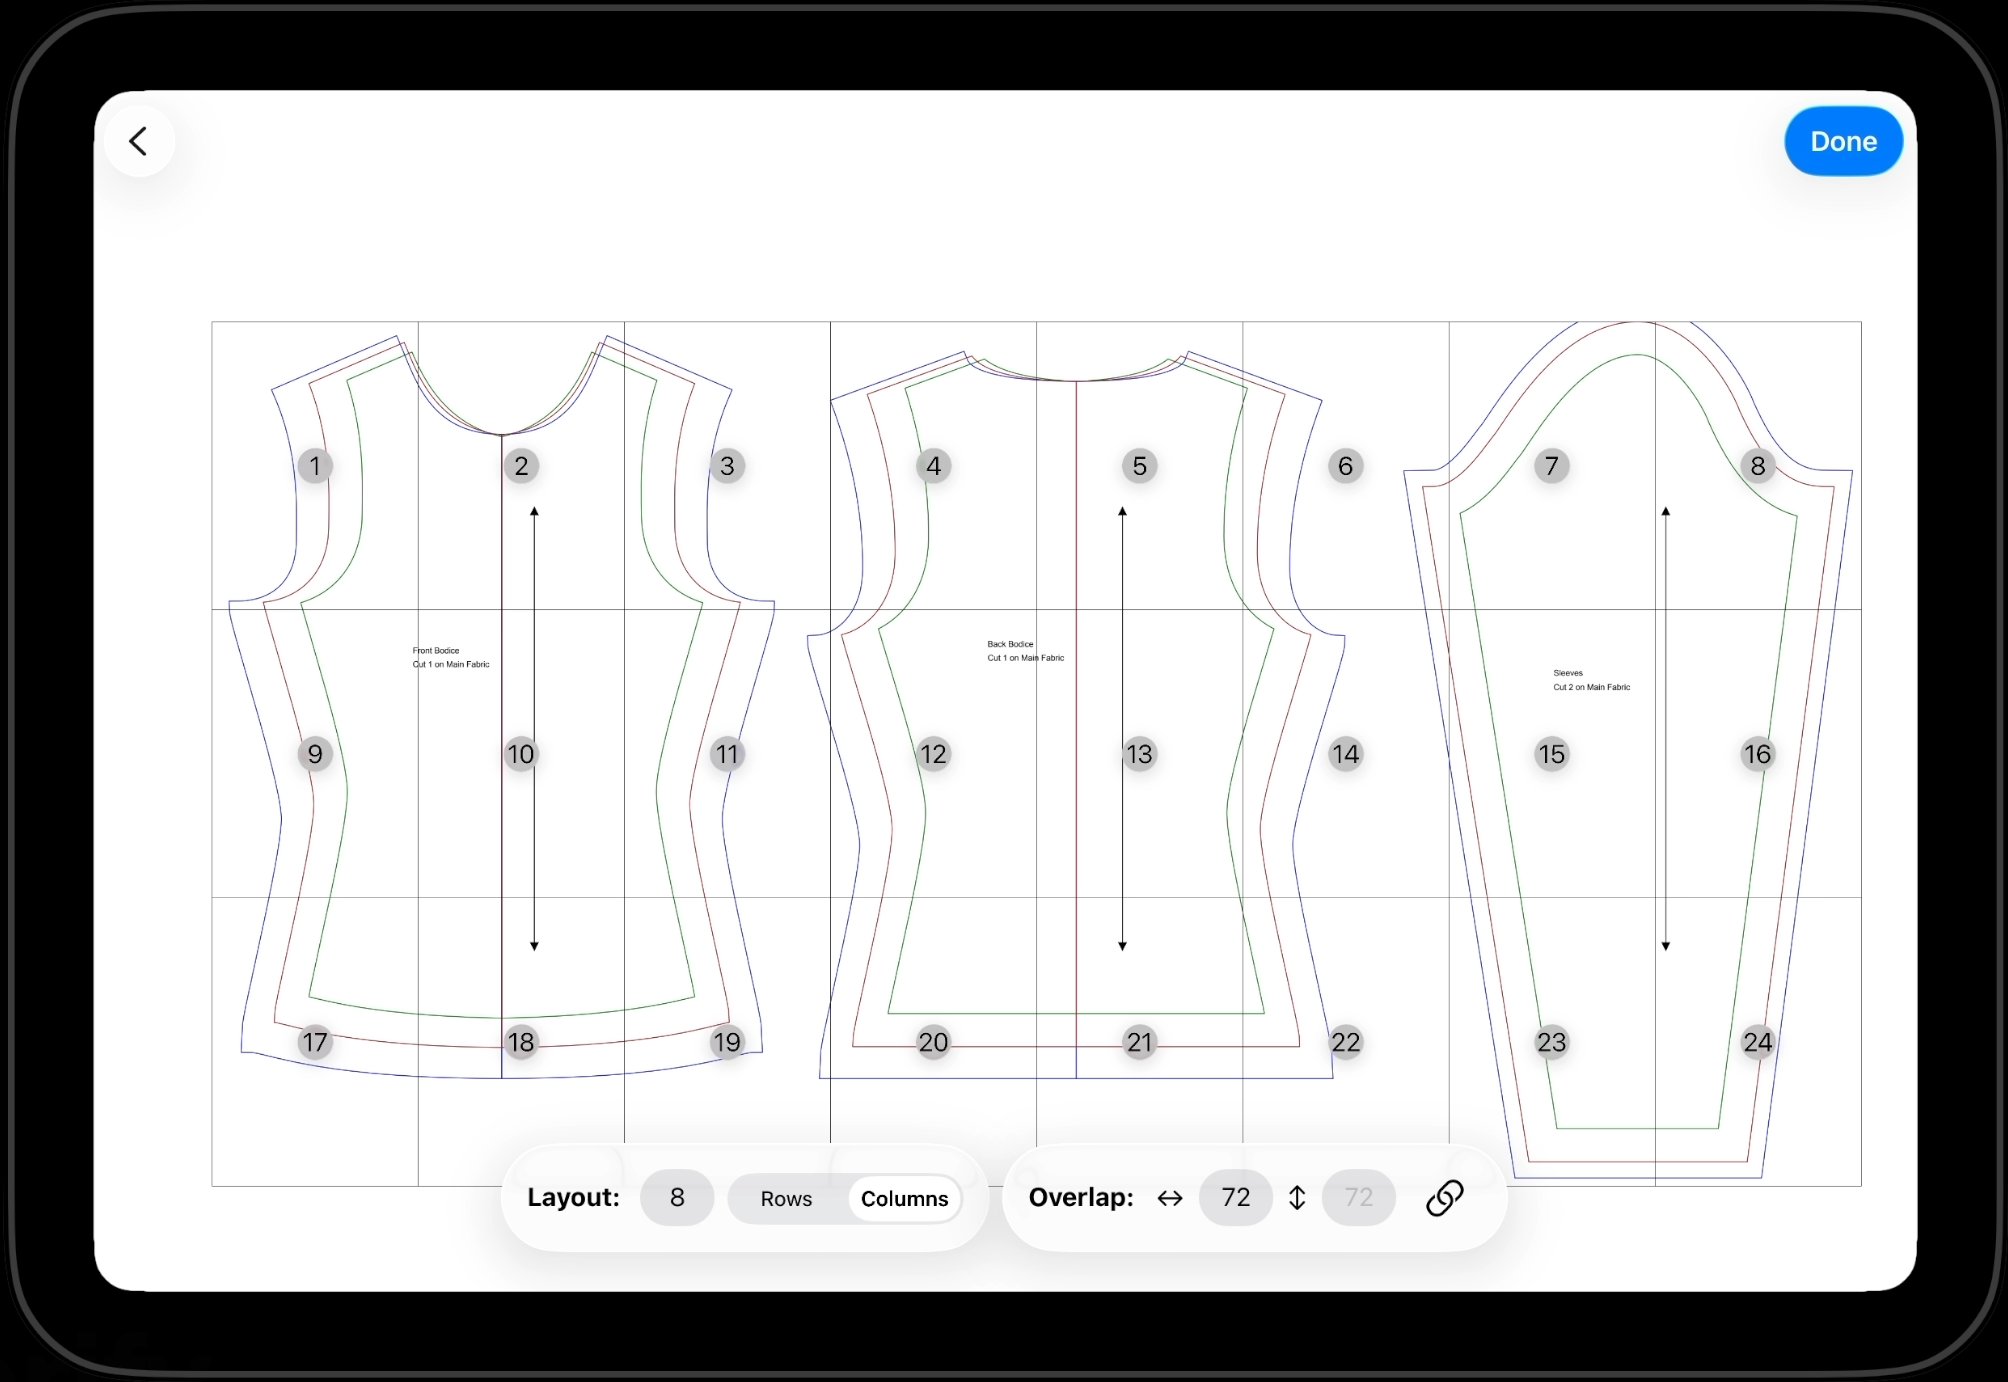
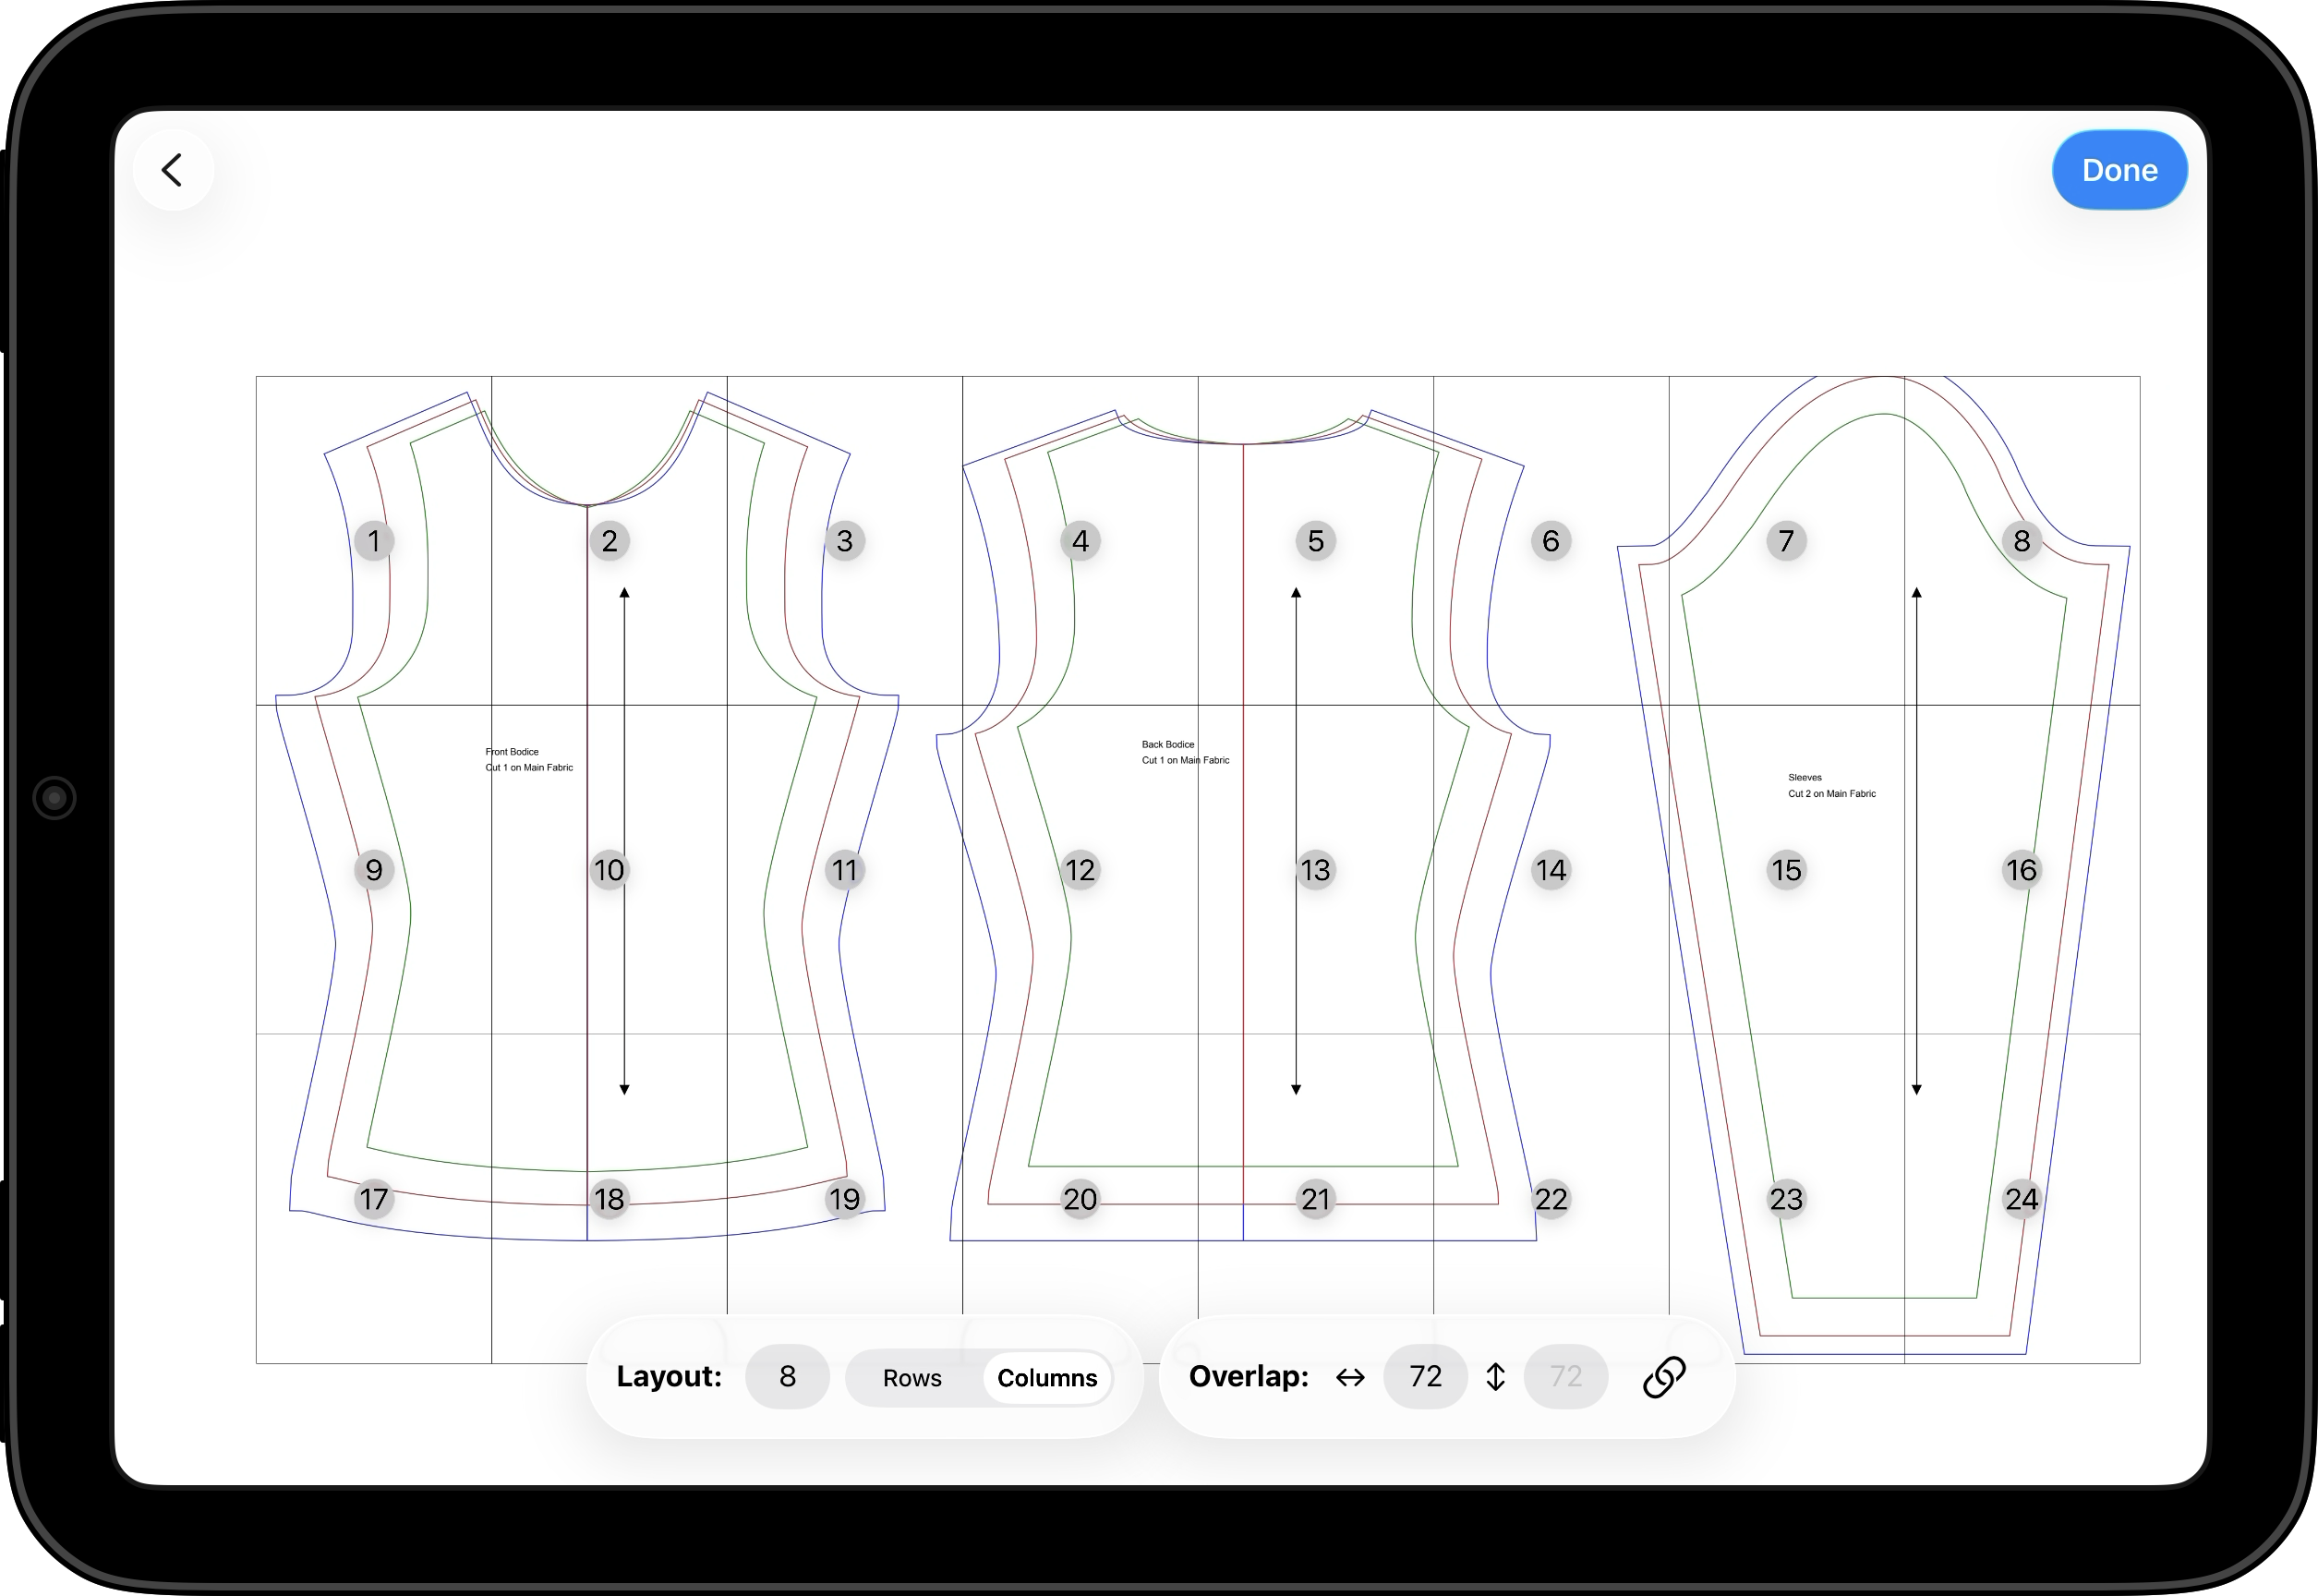
The next steps is to select the choose the number of rows/columns. Tap on the number after layout and choose the number. In our scenario, at 8, the pattern looks right.
5
Overlap
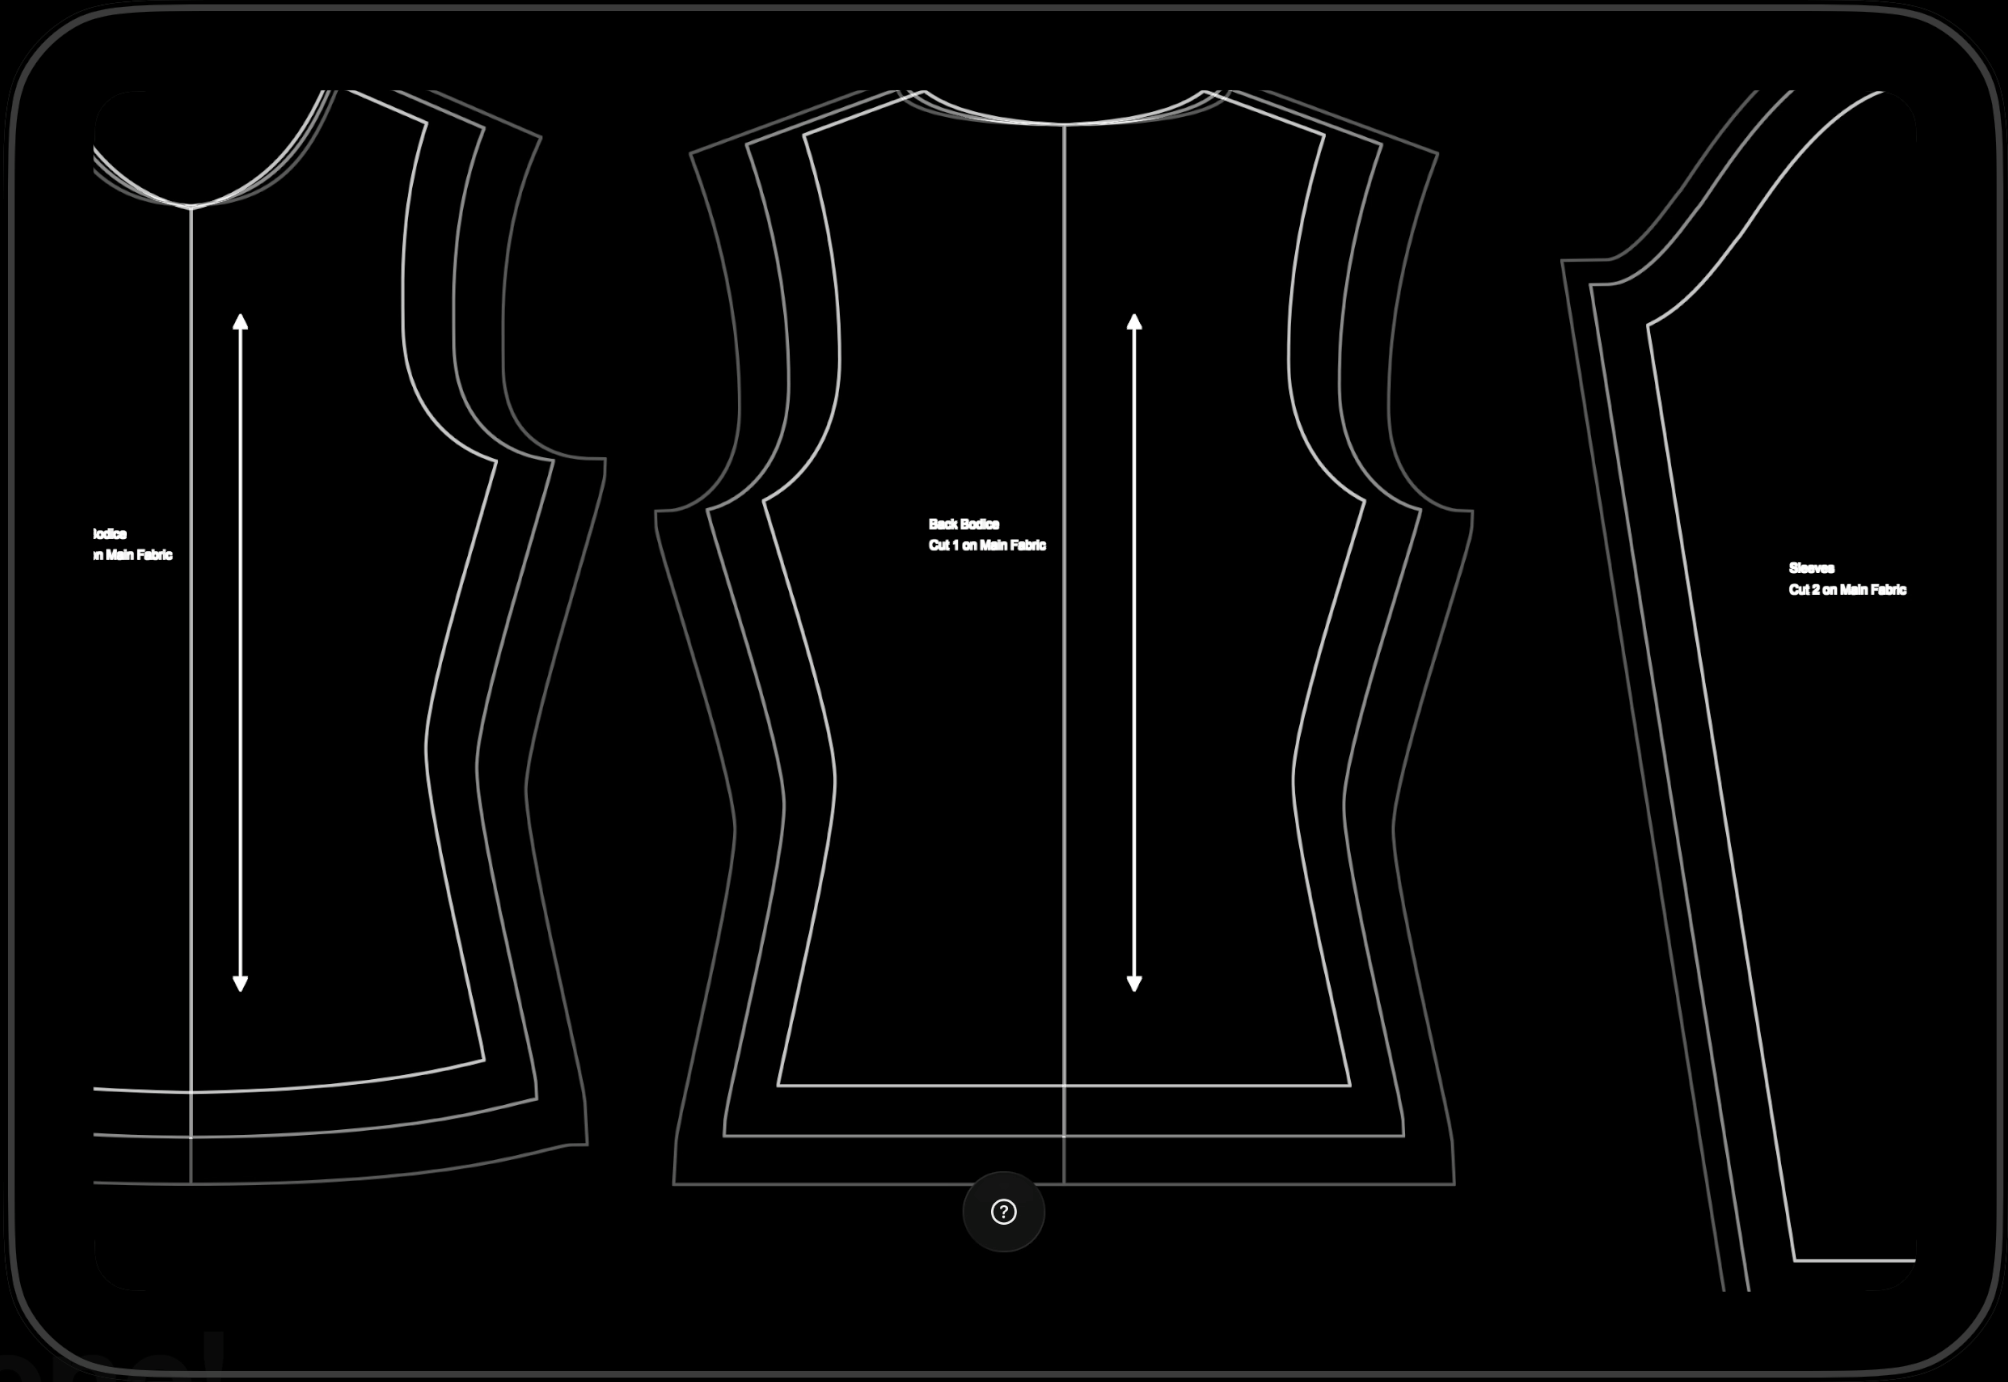
Once the layout is correctly set, the next step is to set their overlap. Overlap is how much of each page is duplicated on each page. Increase the overlap so that the pages line up
6
Done
You can now can verify the pattern looks stitched and press done to accept. The pattern is now loaded stitched and is ready to project. This project will be saved for you so you can open it up later and not need to stitch again